
Send a campaign
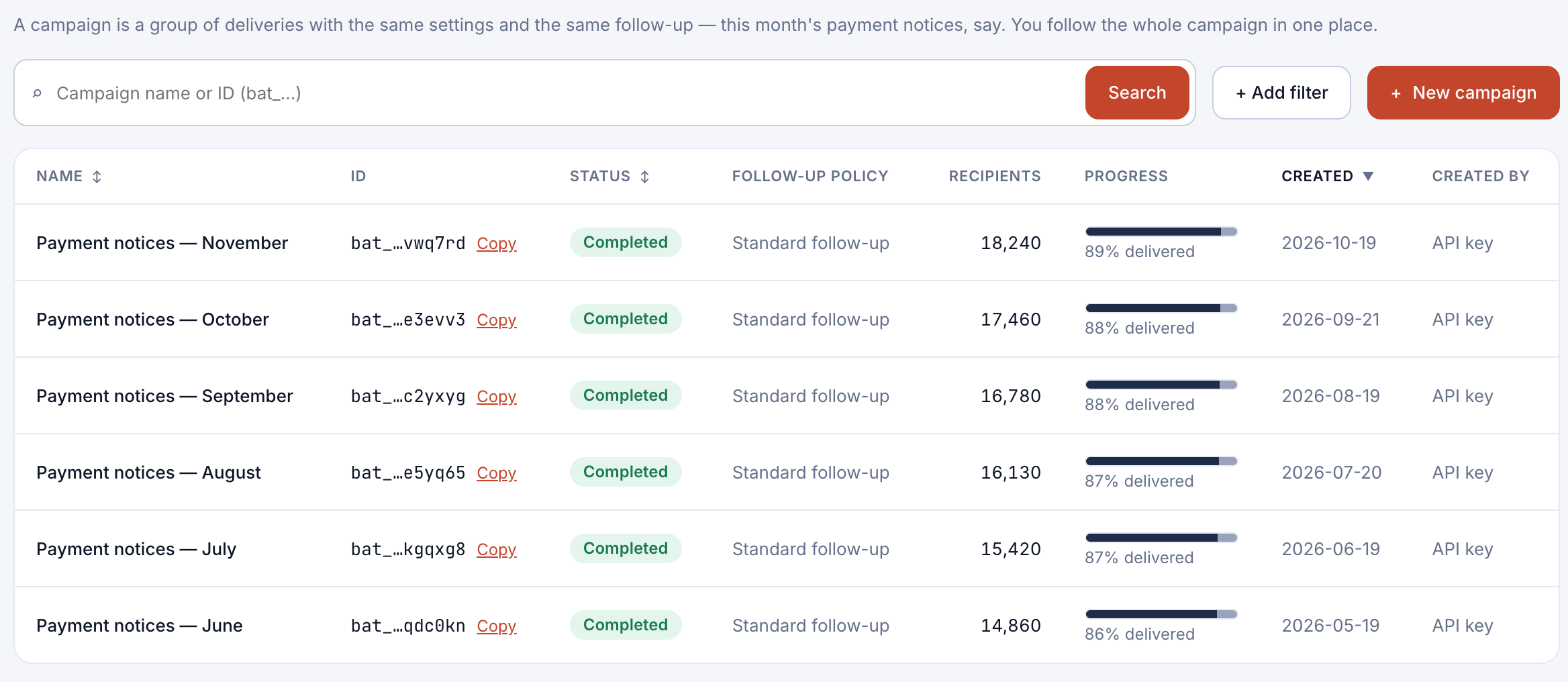
A campaign sends many deliveries with the same settings and the same follow-up, such as this month's payment notices. You set it up once, add the recipients from a file, check everything, and send it out.
Who can do this: team members whose role lets them create and send deliveries. Try your first campaign in test data: nothing is sent and nothing is billed.
Step 1: Create the campaign
- Open Campaigns and click + New campaign.
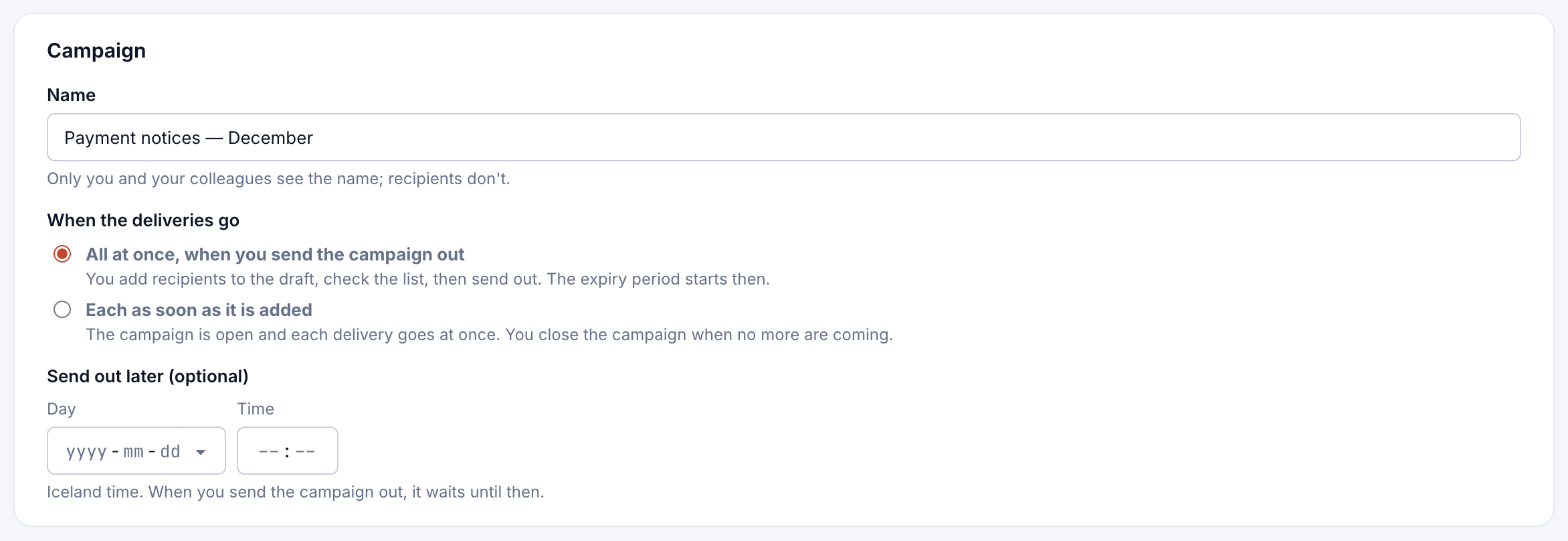
- Under Campaign, give it a Name (only your team sees it) and choose When the deliveries go:
- All at once, when you send the campaign out: you add recipients to a draft, check the list, then send out. The expiry period starts then.
- Each as soon as it is added: the campaign stays open and each delivery goes at once, for example when your system adds them through the API. You close the campaign when no more are coming.
- Under Look and message, choose the Brand profile, the Language, an optional Message to the recipient, and whether to Hide the employee's name.
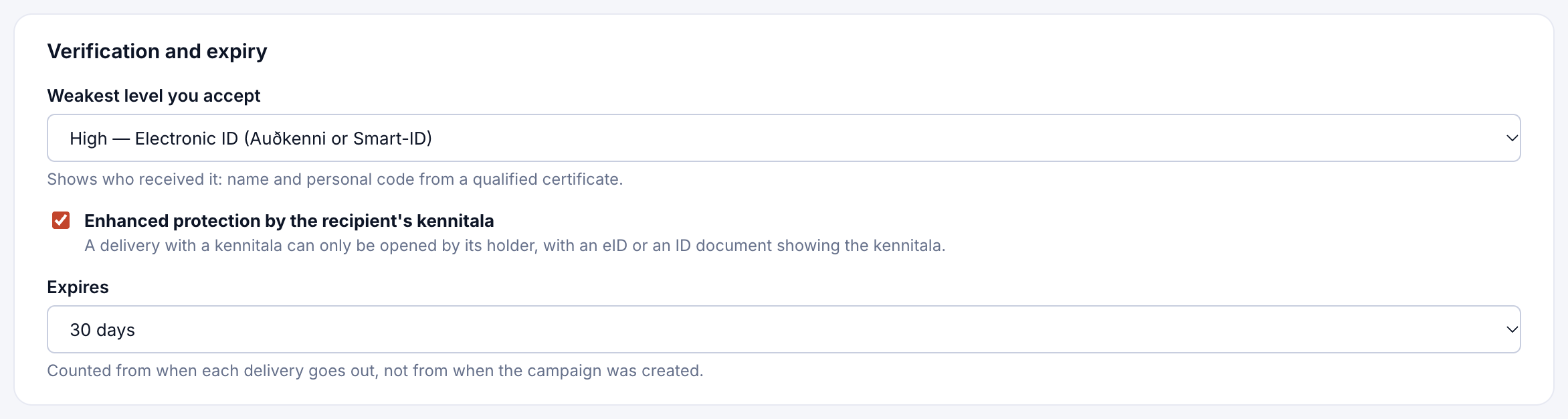
- Under Verification and expiry, choose the Weakest level you accept, whether to use Enhanced protection by the recipient's kennitala, and when deliveries Expire (counted from when each delivery goes out).
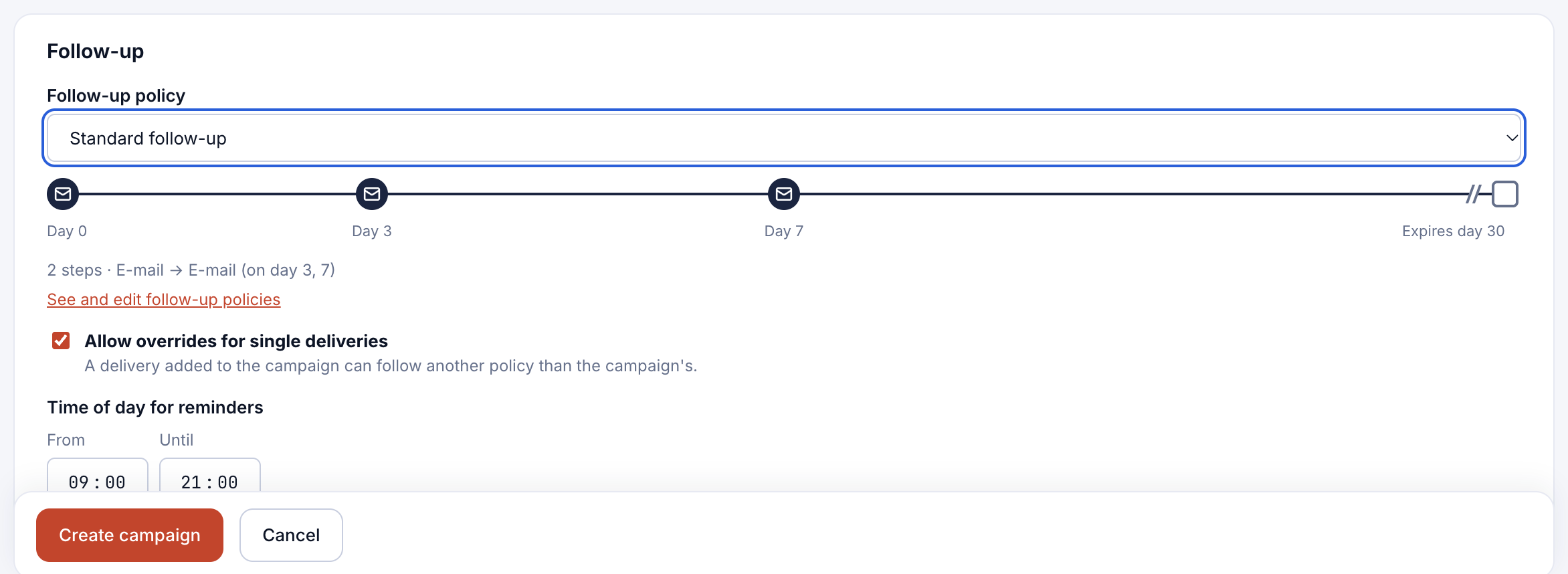
- Under Follow-up, choose the Follow-up policy, whether to Allow overrides for single deliveries, and the Time of day for reminders. Reminders only go within these hours (Iceland time) and never within 24 hours of the last message.
- Click Create campaign. The campaign is saved as a Draft.
Step 2: Add the recipients
- In the draft, click + Add from a file (CSV or Excel) and choose your file. See Prepare a campaign file. You can also add a single recipient with + Add one delivery.
- Under Columns, check that each field is matched to the right column in your file. The First line shows an example value.
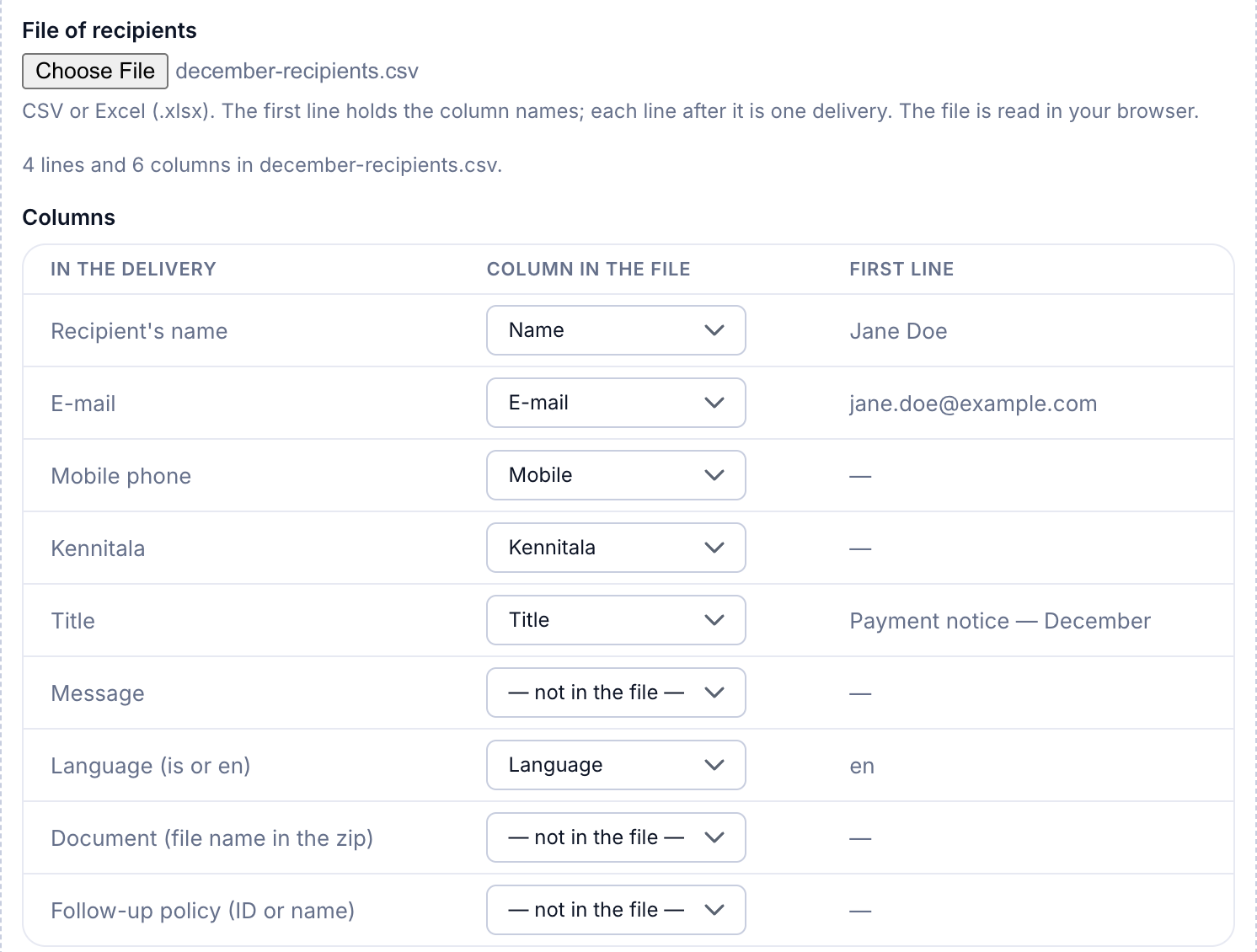
- Under Documents, choose The same document for everyone or A zip of the documents, and add the file.
- Parasend checks every line. If something is wrong, it lists the lines and why, for example Line 7: the e-mail isn't valid. Click Import.
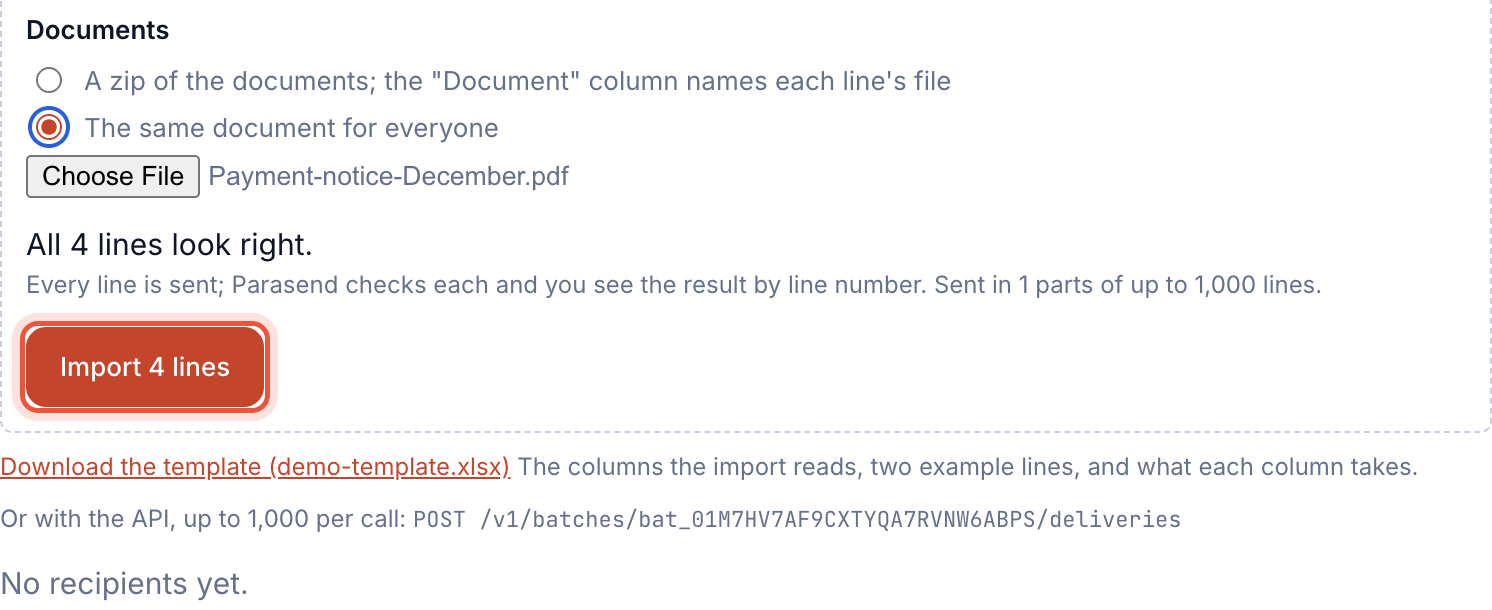
When the import is done you see how many deliveries were added. Refused lines can be downloaded as a CSV file, fixed and imported again; nothing is added twice.
Step 3: Check and send out
- Go through the Checklist before Send out. Every point must be green.
- Click Send a test to yourself to see the notice and the reminder exactly as recipients will get them. The subject starts with "Test:" and the link leads nowhere.
- Click Send out (or Schedule send-out if you set a time) and confirm. The notices start going out at once.
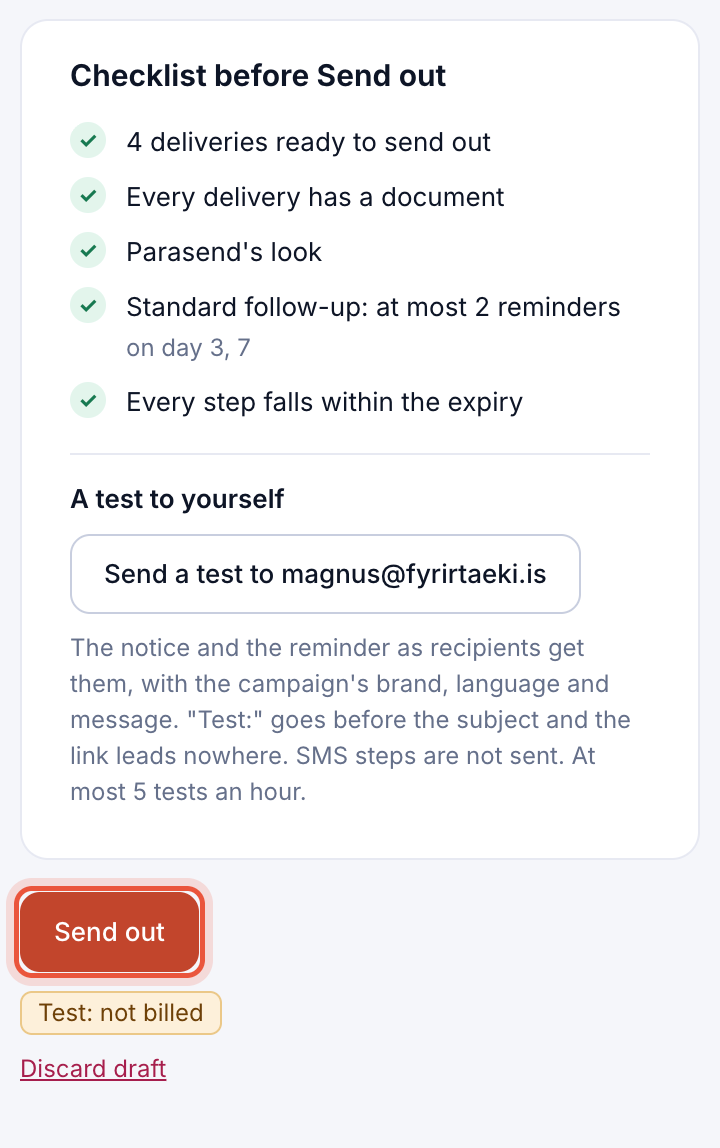
A send-out can't be undone. To stop deliveries that haven't been opened yet, cancel the campaign: see Cancel, close or copy a campaign.
Didn't mean to make the draft? Click Discard draft. Nothing has been sent.
Next: Follow a campaign