
Set up a webhook
Webhooks tell your systems about events the moment they happen, for example when a recipient confirms receipt. Parasend calls your URL with a signed, thin notification that holds no personal data: only the event type and the ID. Your system then fetches the details with its API key.
Who can do this: members with the right API keys and webhooks who see all team deliveries. Webhooks in test data receive only test deliveries' events.

Create a webhook
- Open Webhooks and click + New webhook.
- Enter the URL. It must be https on port 443, on a host on the open internet. Parasend checks the URL when you save and on every connection.
- Optionally add a Description, such as "accounting system".
- Under Events, choose All events (including any added later) or Choose events.
- Under Source, choose All deliveries, or Only from chosen API keys to get events only for deliveries sent with those keys. This is useful when several systems share one account.
- Under Authentication at your end, choose None, Static bearer token or OAuth 2.0. See Webhook authentication.
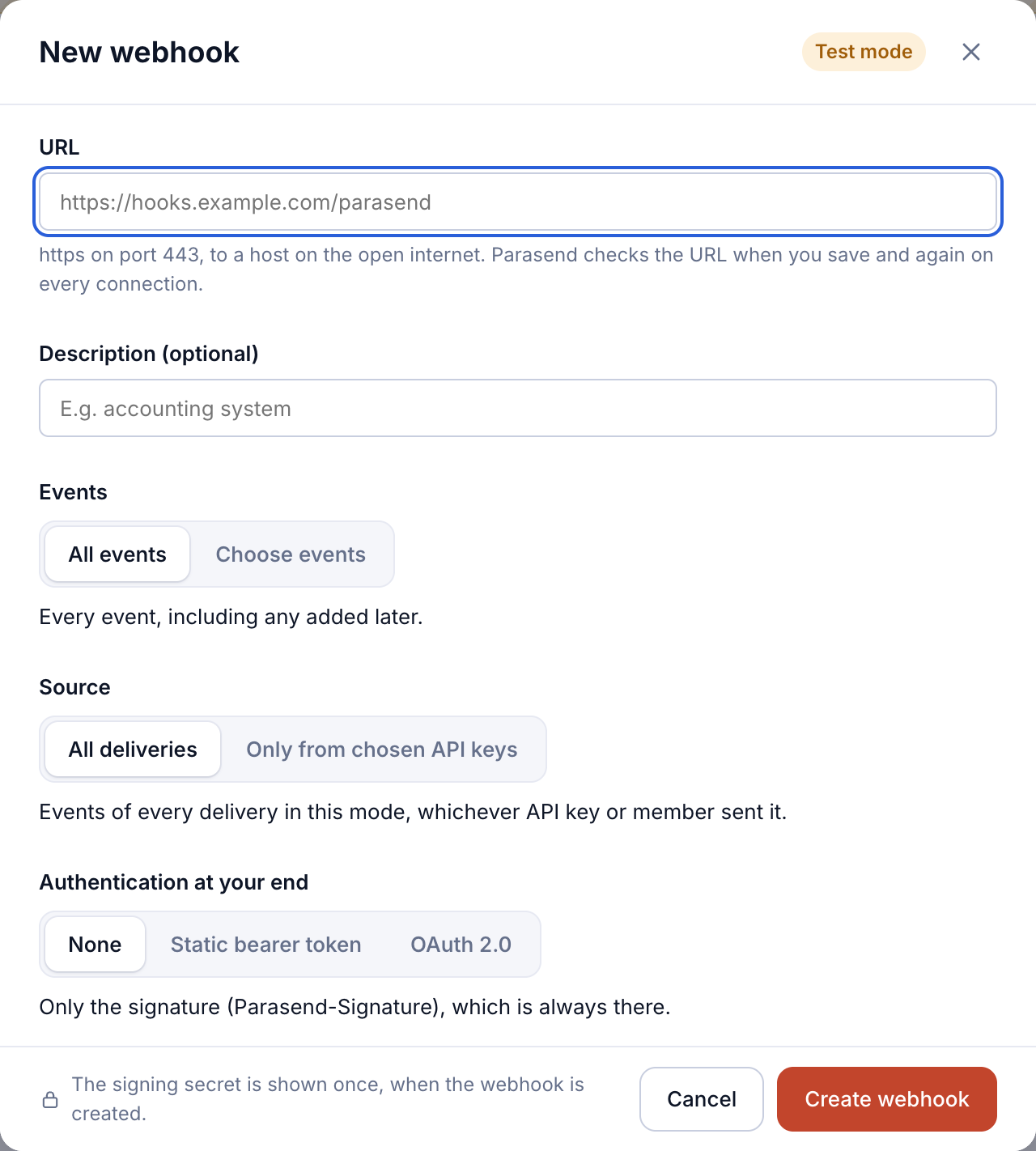
- Click Create webhook and copy the signing secret. It is shown only once.
Answer and verify
- Answer with any 2xx status within 10 seconds. Anything else, including a redirect, counts as a failed attempt. Store the event and process it in the background.
- Check the
Parasend-Signatureheader on every request:t=<unix seconds>,v1=<hex HMAC-SHA256 of "<t>.<raw body>">, with your signing secret as the key. Reject requests whosetis more than 5 minutes from your clock. - Events can arrive more than once and out of order. Use the event ID to skip duplicates.
Code examples for Node.js and Python are in the API reference.
Manage a webhook
In the list, use Edit, Roll secret (a new signing secret), Pause or Delete. The list shows each webhook's status, its last attempt and any failures.