
Send a delivery
A delivery sends one or more documents to one recipient, who must identify before they can open them. This article walks through the New delivery form from top to bottom.
Who can do this: team members whose role lets them create and send deliveries. To send to many recipients at once, use a campaign instead.
Step 1: Start a new delivery
Click + New delivery on Home or at the top of Deliveries.
If the top of the form says Test mode is on, you are in test data: the delivery won't reach the recipient. Click Switch to live data to send it for real. See Test data and live data.
Step 2: Add the documents
Under Documents, drag your files into the box or click choose files. You can add several documents, up to 250 MB in all. Click Download to check a file, or × to remove it.

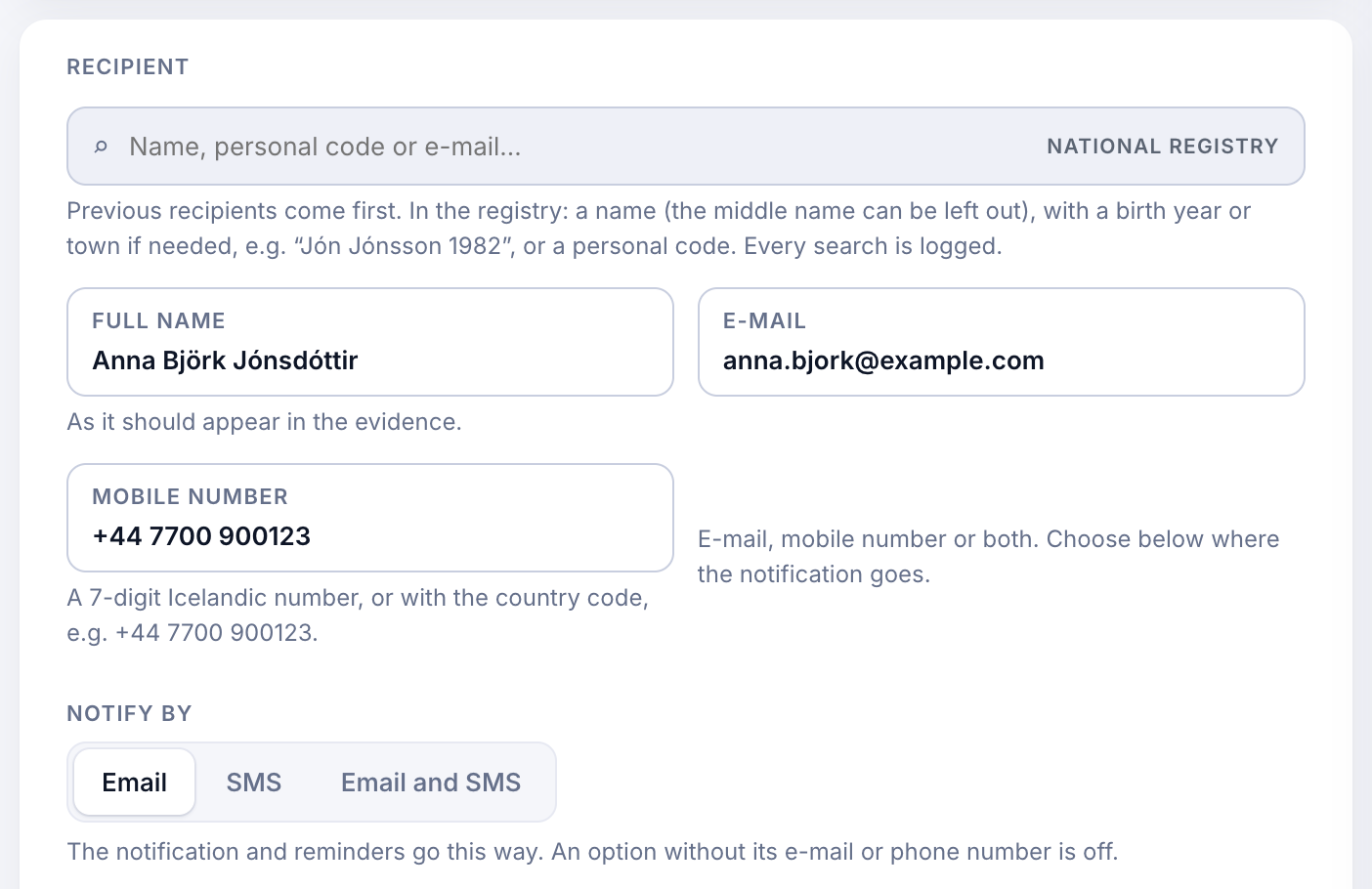
Step 3: Enter the recipient
- Search for the recipient in the search box. Previous recipients come first. You can also search the National Registry by name (with a birth year or town if needed, for example "Jón Jónsson 1982") or by kennitala. Every search is logged.
- Check or type the Full name as it should appear in the evidence, and the recipient's E-mail, Mobile number or both. For numbers outside Iceland, include the country code.
- Under Notify by, choose Email, SMS or Email and SMS. The first notice and any reminders go this way.
Step 4: Enhanced protection
Enhanced protection makes sure only the right person can open the delivery. It is on by default. Choose the Match type and enter the recipient's kennitala (or passport or ID card number). Anyone else who opens the link is refused, and the title stays hidden until the recipient has verified who they are.

If you don't know the recipient's kennitala, turn Enhanced protection off. The recipient still has to identify, and the evidence shows who did.
Step 5: Choose the verification level
The Verification level decides how strongly the recipient must identify. It starts at High (electronic ID). Tick a weaker level only if you accept it for this delivery. See Choose how recipients identify themselves.

Step 6: Add a title and message (optional)
- The Title is shown in the notification and in your deliveries list.
- The Message to the recipient (up to 1,000 characters) is shown in the notification and before the recipient identifies. It is not part of the evidence, so don't put confidential information in it.

Step 7: Check the options

| Option | What it does |
|---|---|
| Expires | How long the recipient has to open the delivery: 7, 14, 30, 60 or 90 days, or a date you choose. |
| Brand profile | How the notification and the recipient's page look. The delivery keeps the version it is sent with. See Create a brand profile. |
| Follow-up policy | Automatic reminders if the recipient doesn't open the delivery. The timeline shows when each reminder goes. See How follow-up policies work. |
| Hide the employee's name | The recipient sees only the company's name, not who sent it. Who sent it is still recorded on your side. |
| Notification language | Íslenska or English: the language of the notification and of the page the recipient opens. |
Step 8: Send
The dark card at the bottom right sums up the delivery: the minimum level the recipient must identify at, the number of documents and whether Enhanced protection is on. Click Send.

If something is missing, the reason is shown under the card, for example Enter the recipient's kennitala, or turn off Enhanced protection, to send.
After sending you go straight to the delivery's page. See Track a delivery.